Connecting Team Fit to Planning Center
Team Fit connects to Planning Center using secure OAuth - no credentials to paste, no API keys. The whole process takes about 5 minutes.
Connect Your Planning Center Account
Team Fit uses OAuth to connect to Planning Center - the same secure standard used by apps like Spotify, Google, and Slack. You click a button, approve access in PCO, and you're done. No passwords, no tokens, no copy-pasting.
You'll need to be signed in to Planning Center with an account that has admin or owner access for your organization.
- In Team Fit, go to Settings → Planning Center
- Click Connect Planning Center
- You'll be redirected to Planning Center - sign in if prompted
- Review the permissions and click Authorize Team Fit
- You're redirected back to Team Fit with a green Connected badge
Create a Note Category and Add the ID
When someone submits the assessment, Team Fit adds a note to their Planning Center profile. The note includes the position they expressed interest in, their intent level, department, contact info, and the date submitted.
Notes in PCO are organized by category. You need to create a category called "Team Fit" so Team Fit knows where to file them - then paste the category ID into Team Fit.
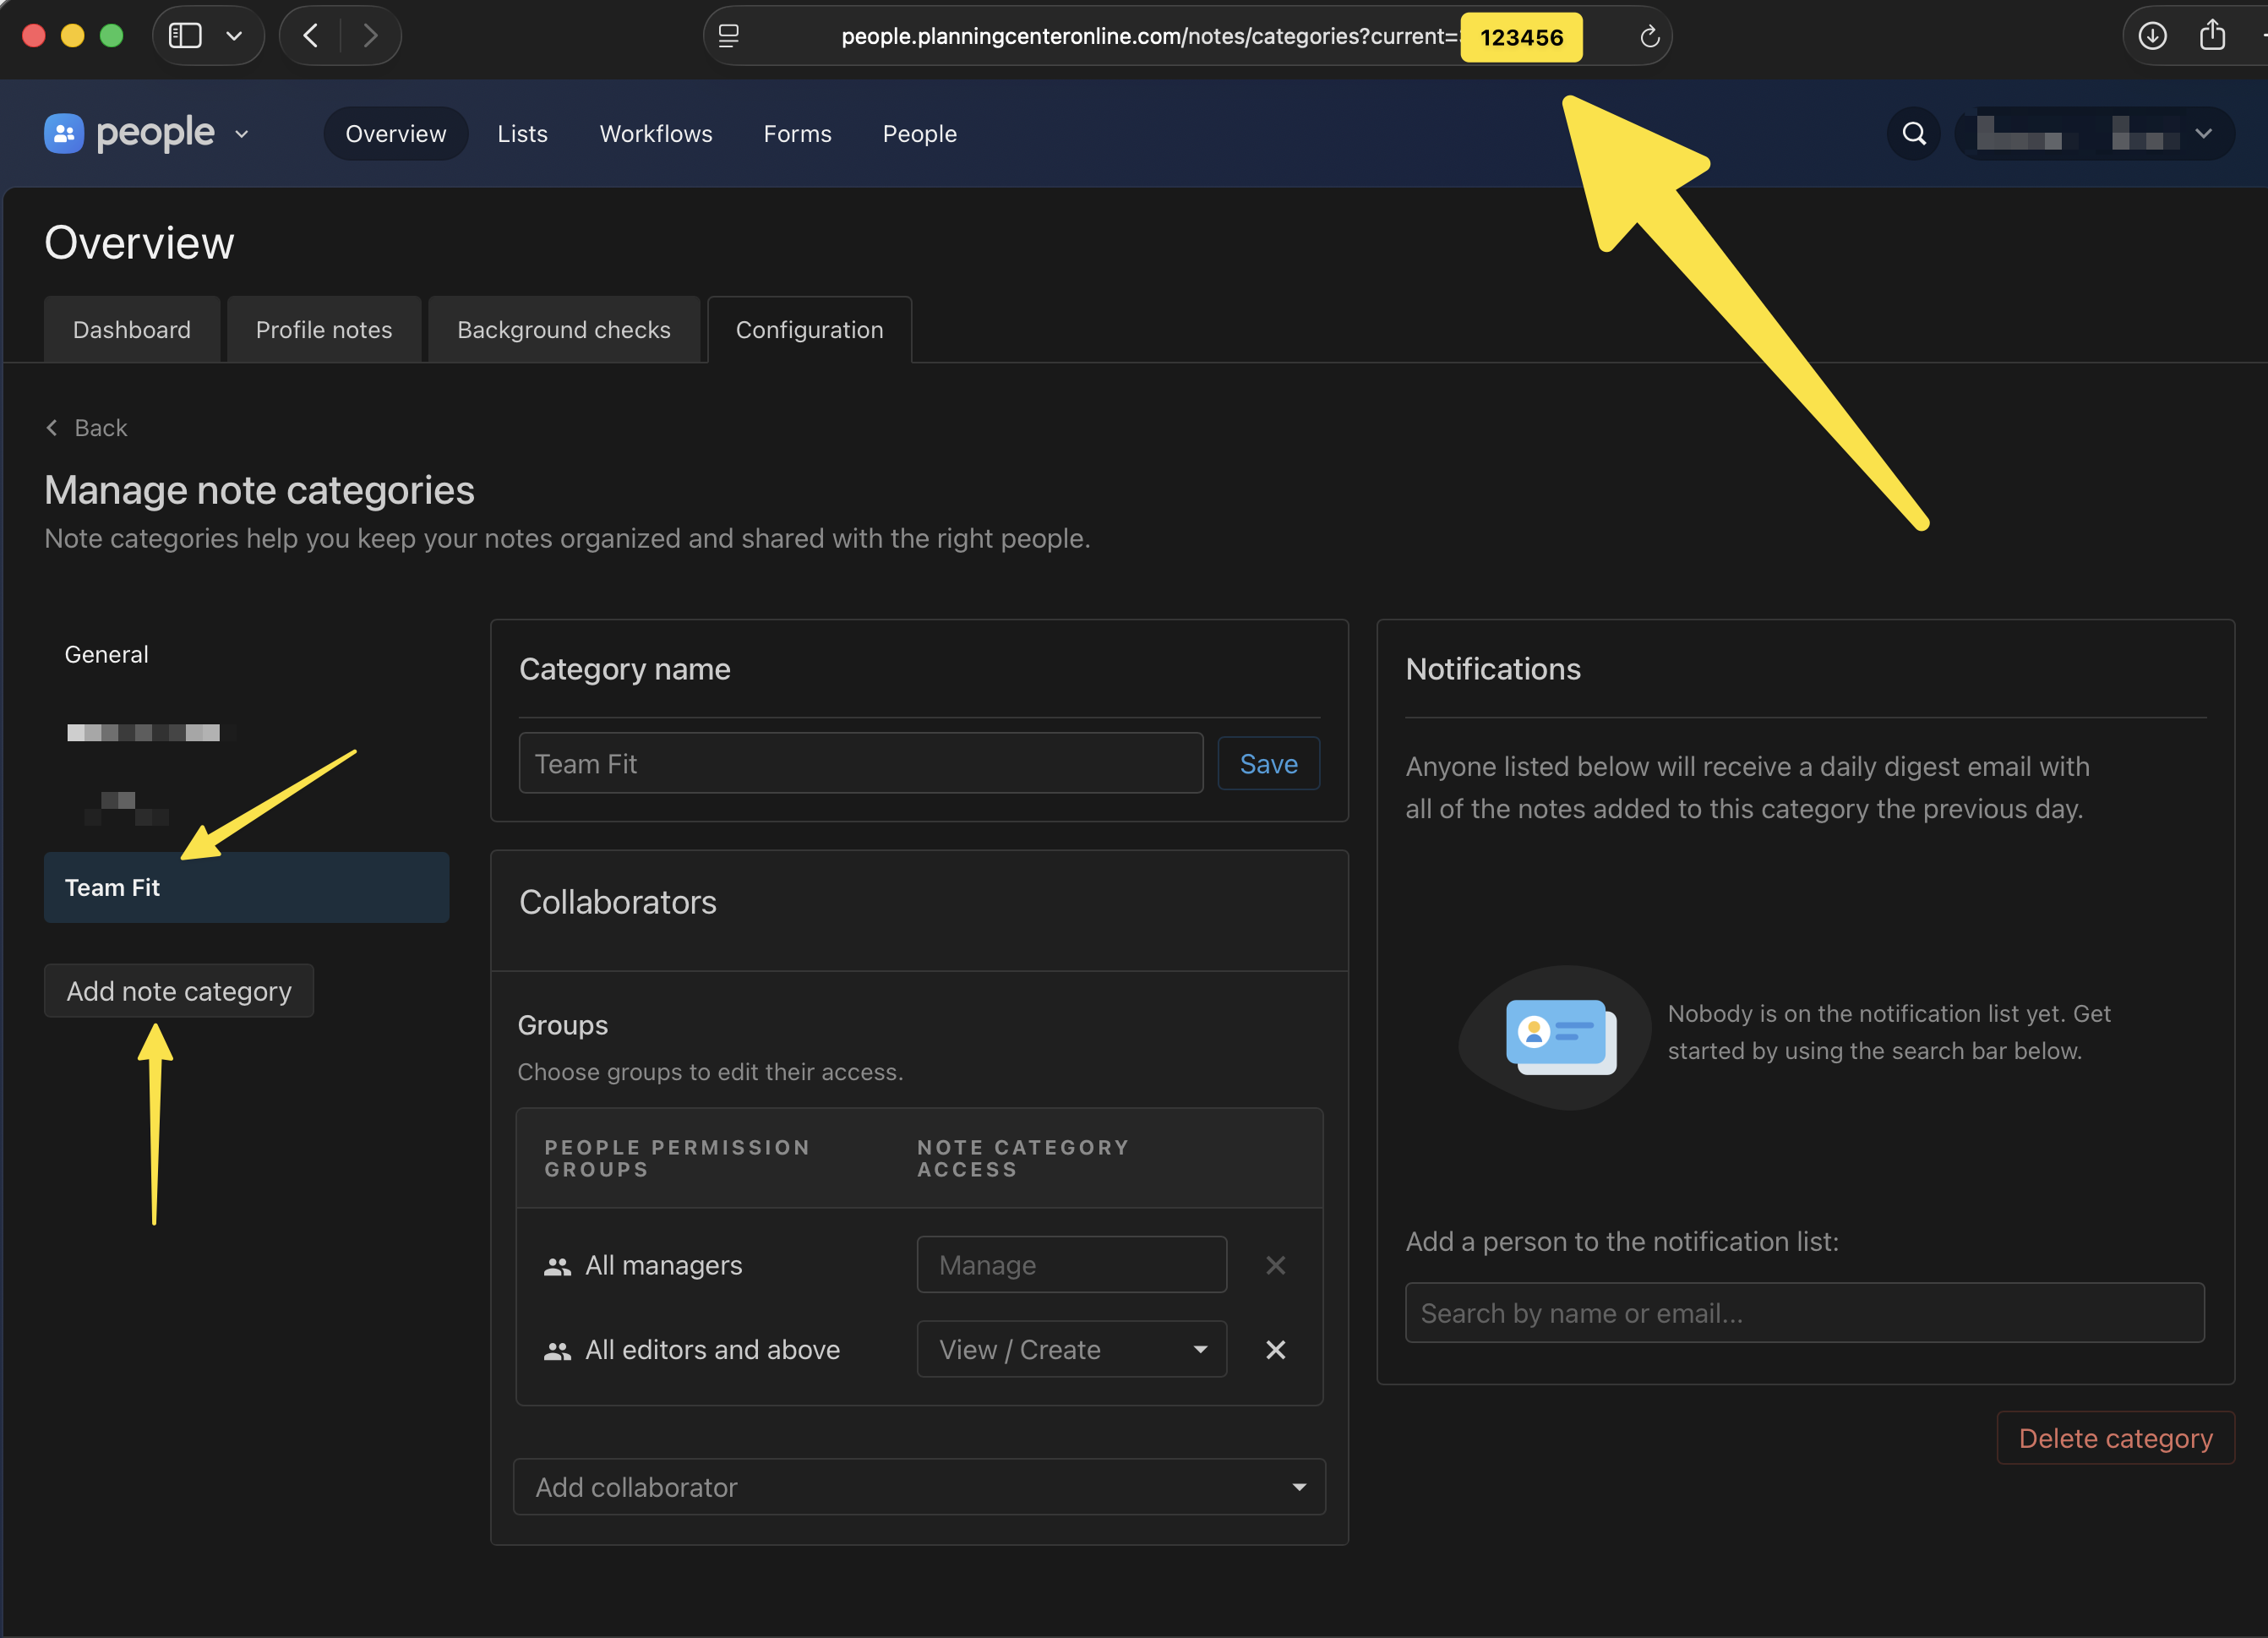
- In Planning Center, go to People → Overview → Configuration → Note Categories
- Click + New Note Category and name it Team Fit
- Save - then click on the category and copy the number from the end of the URL
- In Team Fit, go to Settings → Planning Center → Step 2
- Paste the Note Category ID and click Save
Create a "Team Fit" Custom TabOptional
Team Fit can stamp a person's matched position name directly onto their PCO profile as a Custom Tab field - for example, "Guest Services - Parking Lot Team." This makes it easy to filter and search for volunteers by role inside Planning Center.
No ID required. Team Fit detects the field automatically by name. You just need to create it in PCO and then reconnect in Team Fit Settings.
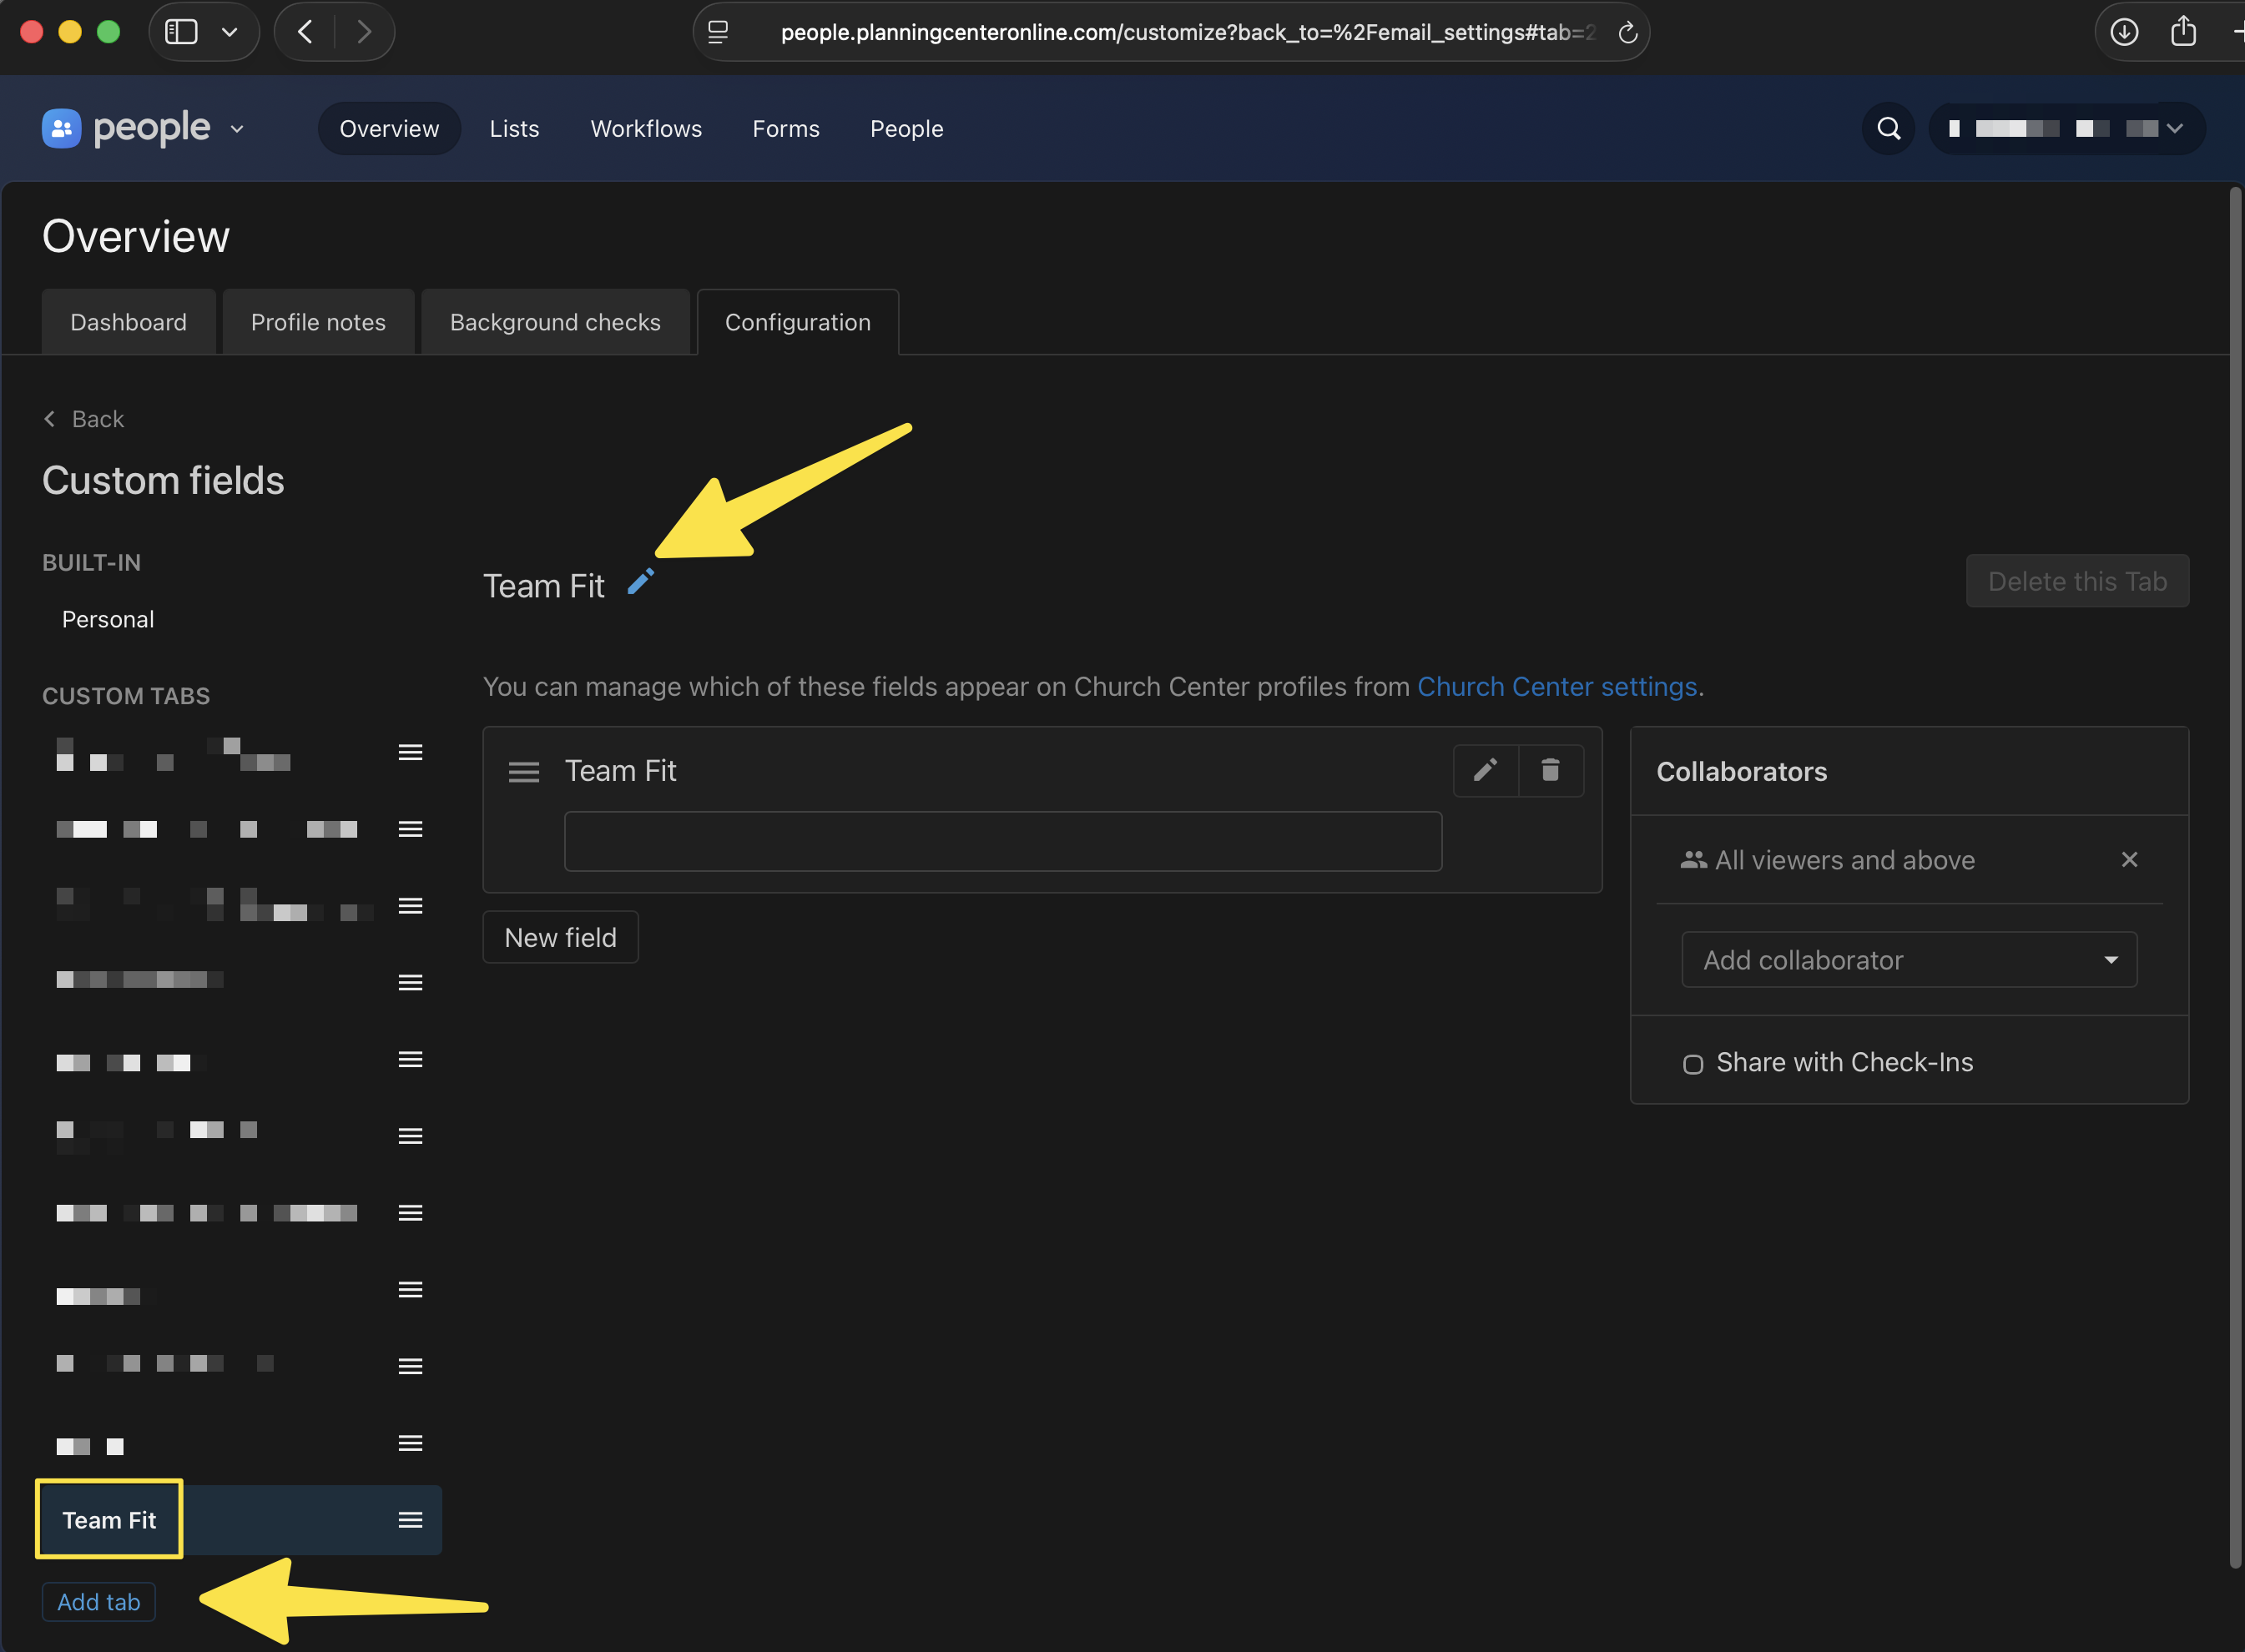
- In Planning Center, go to People → Overview → Configuration → Custom Tabs
- Open an existing tab or create a new one
- Add a Text field and name it exactly Team Fit
- Save
- Back in Team Fit, go to Settings → Planning Center and click Reconnect
- Team Fit detects the field automatically - you'll see a green badge confirming it
Assign Workflows to DepartmentsOptional
If your church uses PCO Workflows for volunteer onboarding, you can connect a workflow to each department. When someone submits and matches that department, they're automatically added to the workflow as a card - your team gets notified and the follow-up starts immediately. No manual trigger needed.
Different departments can have different workflows, and not every department needs one. Departments without a workflow ID skip that step silently - notes and the Custom Tab still sync.
Permissions note: For workflow cards to be created automatically, the Planning Center account connected to Team Fit must be set as a manager on each workflow in PCO. Go to the workflow in PCO → Settings → Managers and add the connected account. Without this, submissions will still sync to PCO, but the workflow card won’t be created.
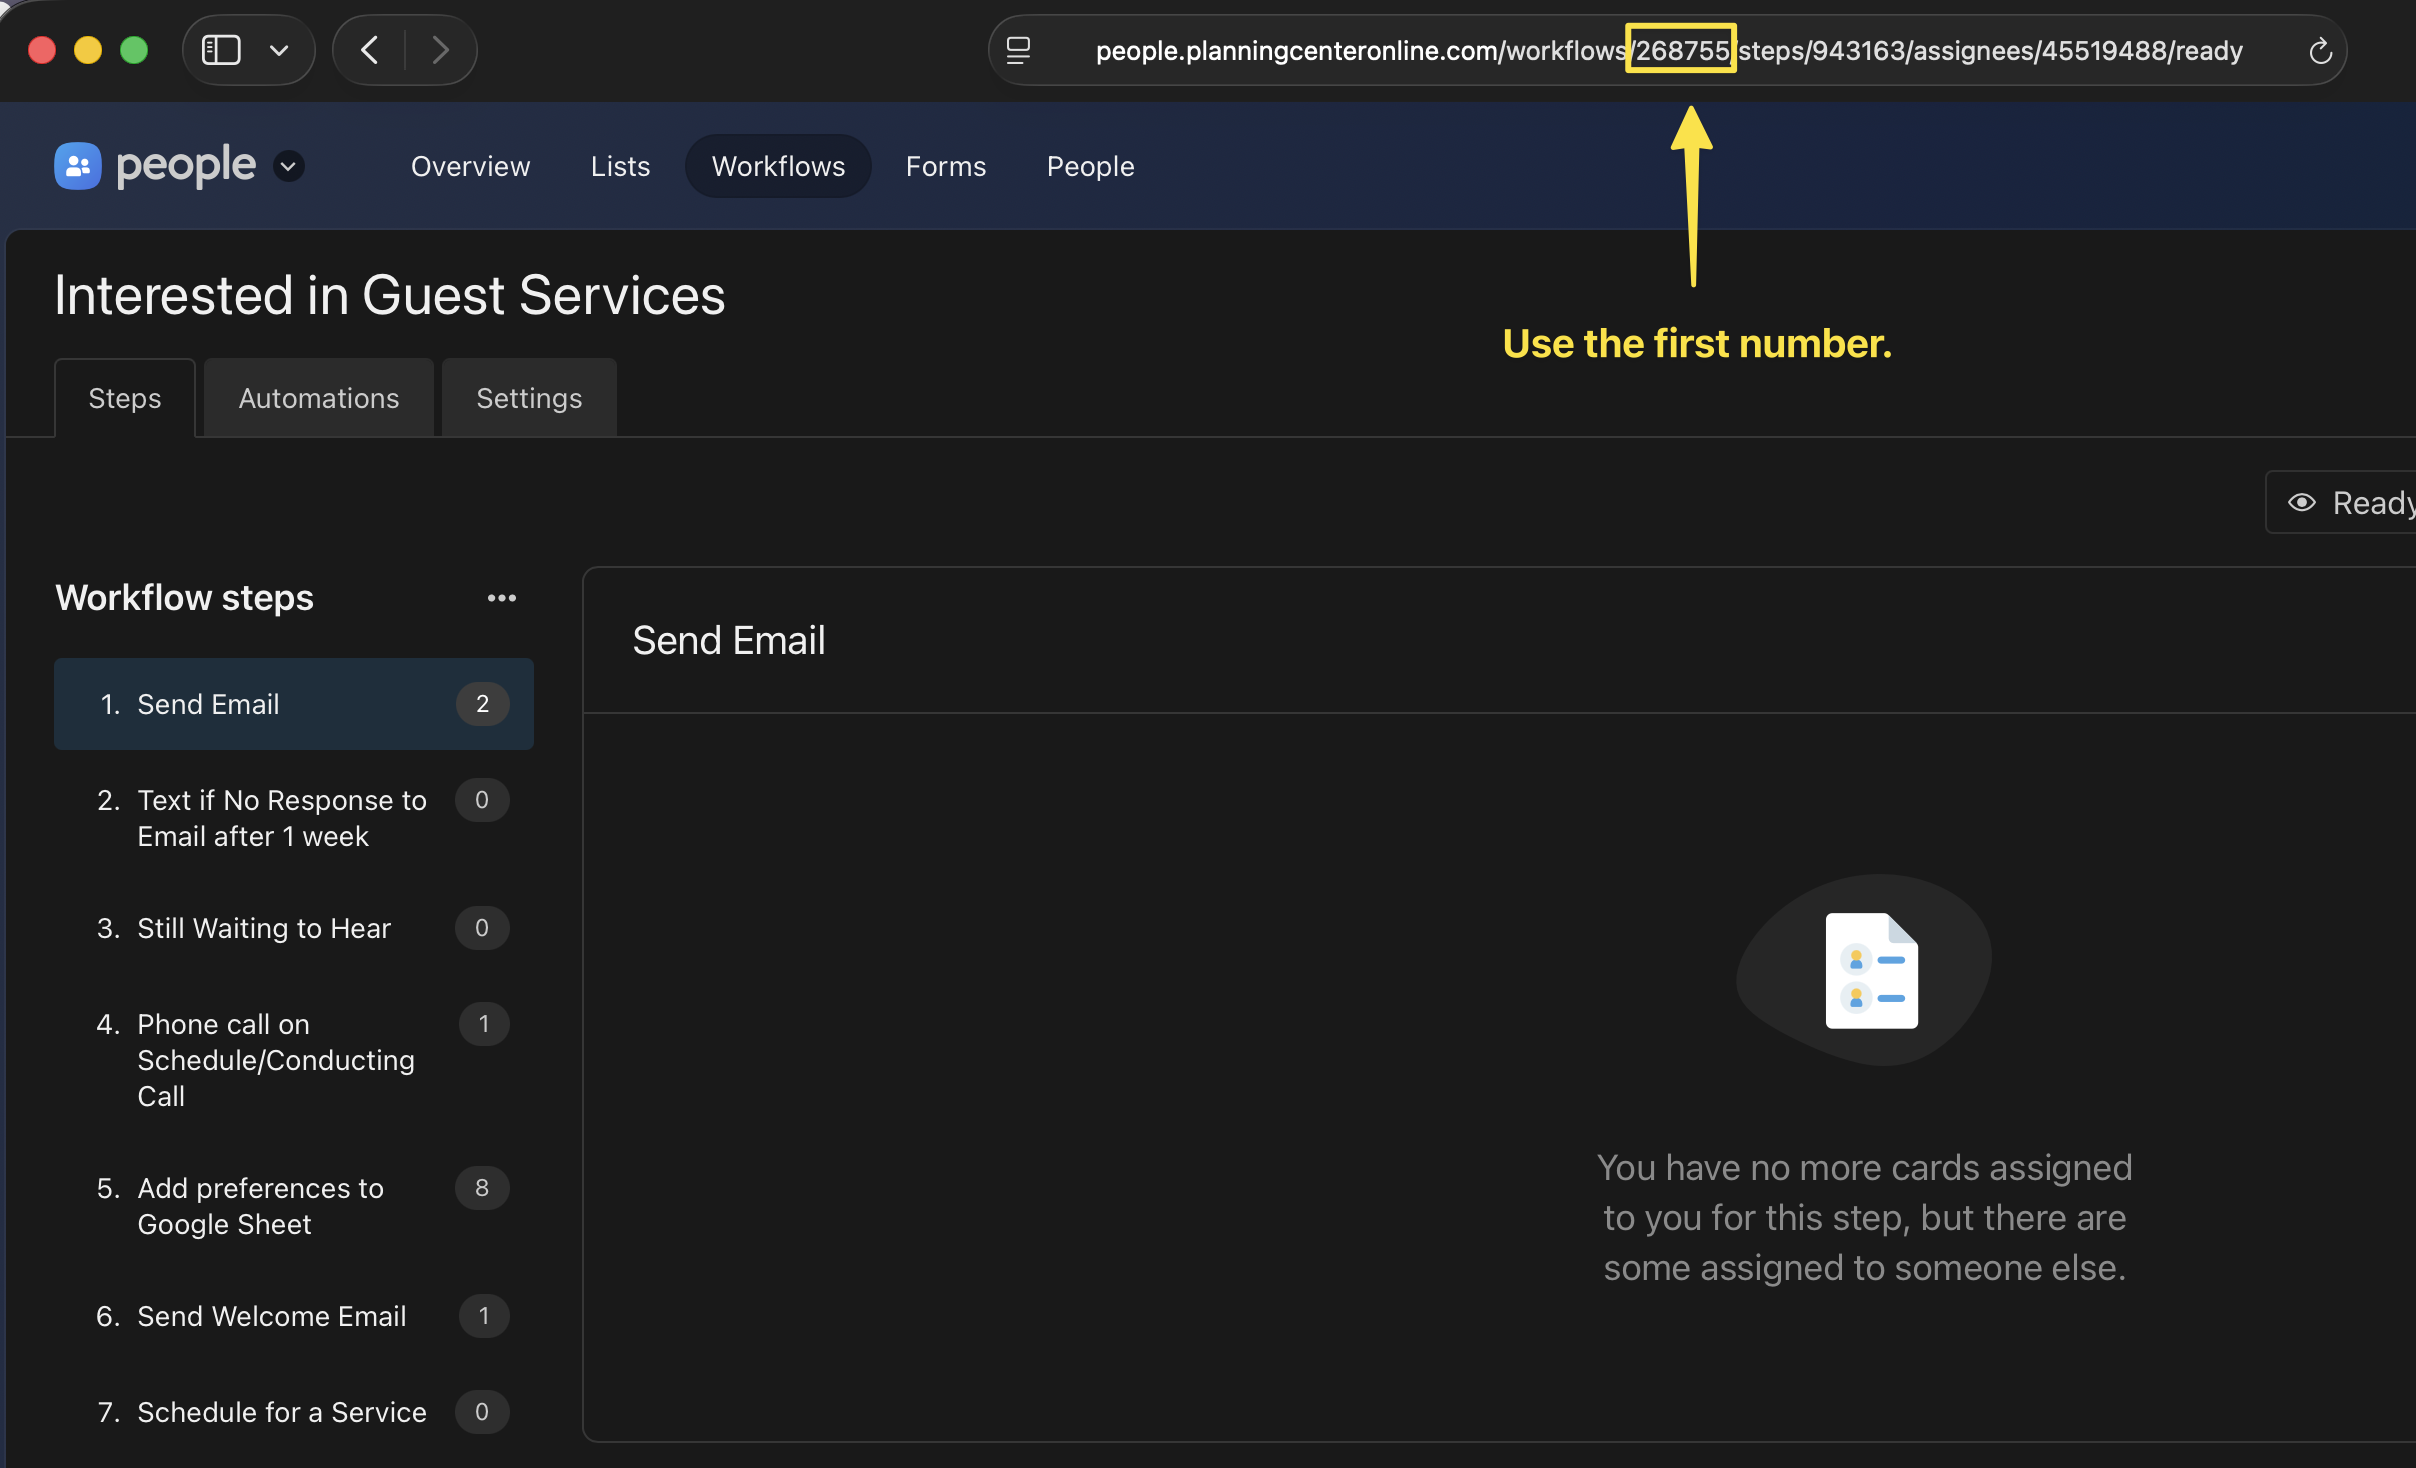
- In Planning Center, go to People → Workflows
- Click on the workflow you want - the ID is the first number in the URL (e.g. /workflows/268755/steps → ID is 268755)
- In Team Fit, go to Departments
- Expand the department → paste the Workflow ID in the Planning Center workflow field
- Save - repeat for any other departments that have workflows
From this point on, every submission automatically syncs to Planning Center. Notes filed. Profiles updated. Workflows triggered. Your team can focus on people - not paperwork.
Not sure if it's worth setting up?
See What Planning Center Does for You